Which components are supported?
If you're using a supported component to validate phone numbers, it's possible to make use of the output elements which are returned from our Experian Phone Validation API. The result and metadata objects contain additional information about the returned phone number, such as phone type, operator name and whether it's a disposable number.
This is enabled through configuration of Touchpoints, either Bound as detailed on this page for the EDQ Record Detail component, or Unbound which is detailed later in this section. Unbound Touchpoints are intended to be used with our Flows components or your own custom Lightning Web Components.
Click on App Launcher. Type EDQ Global Settings in the Quick Find box, and select it.
Select Touchpoints from the left-hand menu.
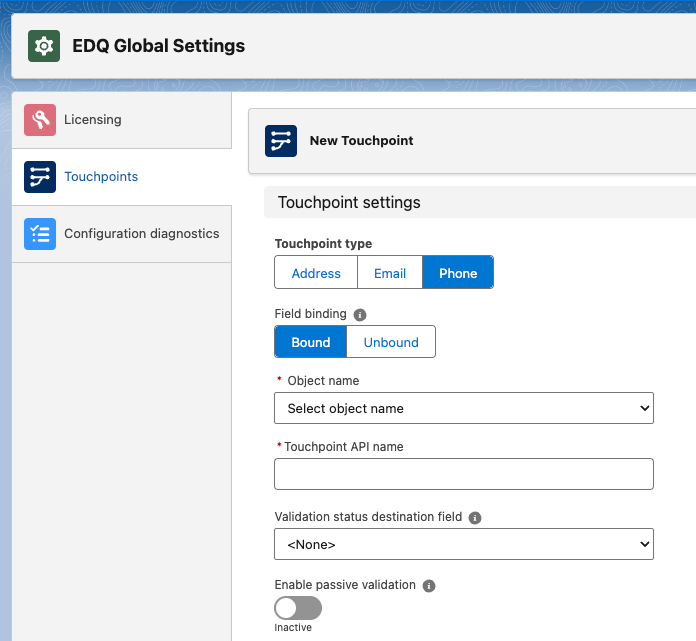
Click the New button found in the top right to create a new Touchpoint configuration for your Salesforce object.
Choose Phone for the Touchpoint type and Bound for the Field binding.
Select your Salesforce object from the Object name dropdown and a Target field dropdown appears, which shows only fields of the right type.
Select your target field from the dropdown.
The Touchpoint API name will be automatically populated for you, but note that this field only becomes useful when using Unbound Touchpoints.
Set the optional destination field for the validation status. By default the validation status is stored in a separate EDQ Log object, which happens in a trigger after the object is saved. If action needs to be taken based on the validation status before saving, then we offer the option of storing the status in a destination field on the record itself. Refer to the EDQ Log custom object guide for details on the possible status values.
Activate the optional Passive validation feature should you wish to use it.
With your phone field configured you can now decide which metadata you want to retrieve and which fields on your object you want this to be mapped to.
You can now create as many mappings as you require. For each mapping you first select from the list of possible metadata elements from our API and then select a field from the Salesforce object chosen for your Touchpoint. For a full list of attributes and their descriptions refer to our Phone Validation API documentation.
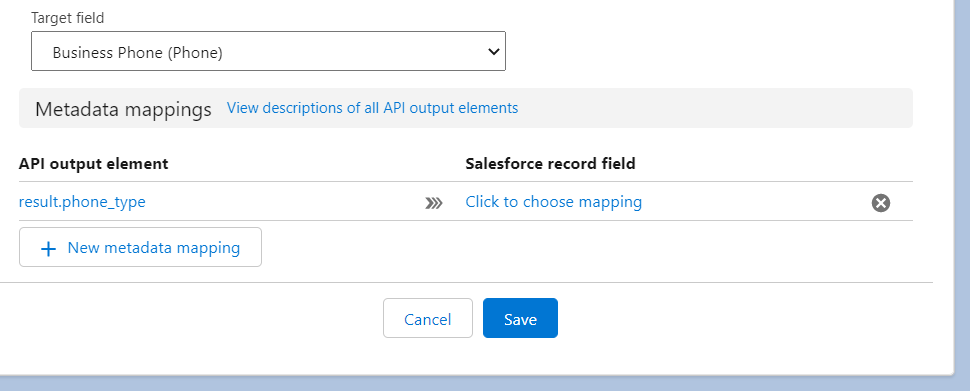
Unwanted mappings can be removed using the cross icon to the right of the mapping and further new ones added using the New metadata mapping button.
Unmapping fields which have already been populated
Once all the mappings have been configured, click the Save button to save your Touchpoint configuration.
Mapped fields must be modifiable
If you mapped an attribute which doesn't exist for the validated phone number, the mapped object field won't be populated when an address is returned following validation.
To make this visible to administrators for debugging purposes we utilize our package's frontend logging which appears in your browser's Developer Console. Errors will be logged at the following levels.
Default frontend log level is ERROR