Unlike Bound Touchpoints, which are linked to a specific Salesforce object and field, Unbound Touchpoints are intended to be used with our Flows components or your own custom Lightning Web Components (LWC), with mappings made to aliases.
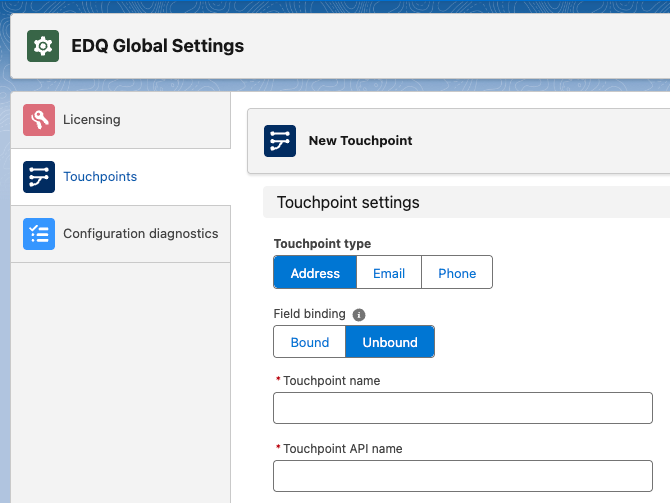
Click on App Launcher. Type EDQ Global Settings in the Quick Find box, and select it.
Select Touchpoints from the left-hand menu.
Click the New button found in the top right to create a new Touchpoint configuration.
Choose Address, Email or Phone for the Touchpoint type.
Set the Field binding to Unbound.
Enter a Touchpoint name of your choice to describe where this Touchpoint will be used, e.g. Account Billing Address Unbound.
The Touchpoint API name will be automatically populated for you, but can be edited as required. It must not contain any spaces, e.g. Account_Billing_Address_Unbound.
With your basic Touchpoint settings in place, you can now decide which additional data you want to retrieve and map it to arbitrary aliases. These aliases will be the field names exposed when the Unbound Touchpoint is consumed in a Flow or your own custom LWC. The mapping configuration differs depending on the Touchpoint type:
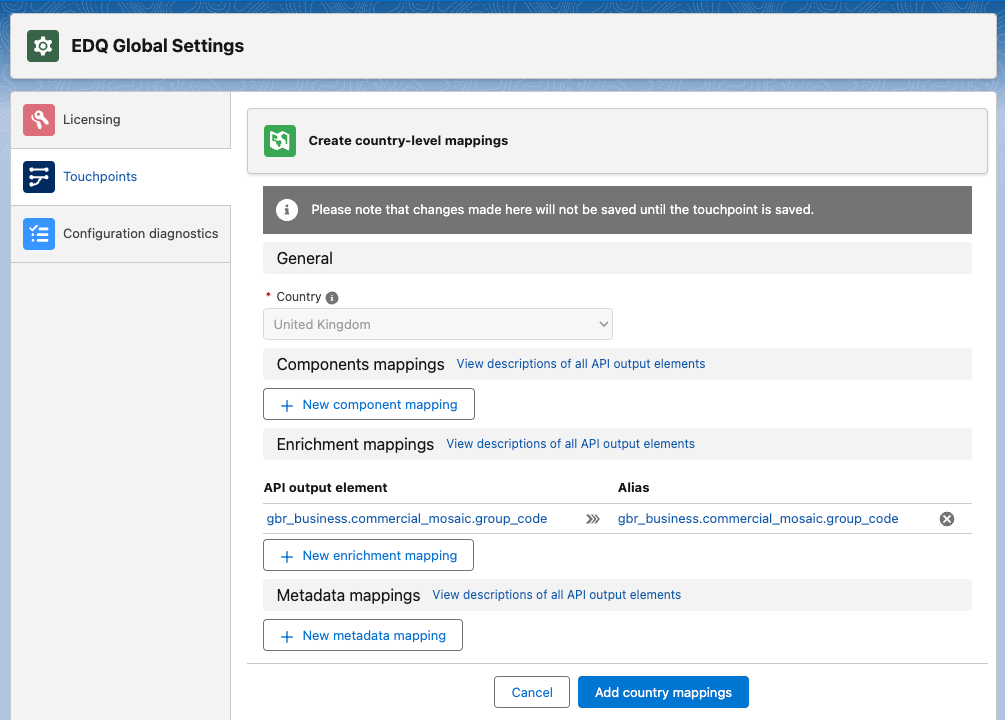
For addresses, this additional data is unique to each country, so a set of mappings must be created for each country you require.
Under the Country-level mapping heading click the New mapping set button.
On the Country level mappings page select your country and the various mappings section will appear below, allowing you to then click the New mapping buttons.
You can now create as many mappings as you require. For each mapping you first select from the list of possible elements from our API and an alias is automatically generated for you, although you are free to edit this string as required. For a full list of elements and their descriptions refer to the relevant API documentation:
Unwanted mappings can be removed using the cross icon to the right of the mapping.
Once all the mappings have been configured, click the Add country mappings button to add the set of mappings for that country.
Repeat this process for other countries as required and then click Save to save your Touchpoint configuration.
Remember to save the Touchpoint
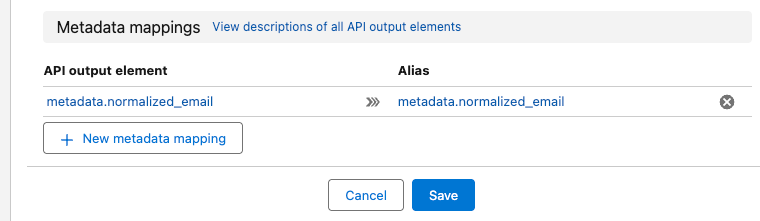
For email addresses, a Metadata mappings section is visible at the bottom of the page.
You can create as many mappings as you require. For each mapping you first select from the list of possible elements from our API and an alias is automatically generated for you, although you are free to edit this string as required. For a full list of attributes and their descriptions refer to our Email Validation API documentation.
Unwanted mappings can be removed using the cross icon to the right of the mapping and further new ones added using the New metadata mapping button.
Once all the mappings have been configured, click the Save button to save your Touchpoint configuration.
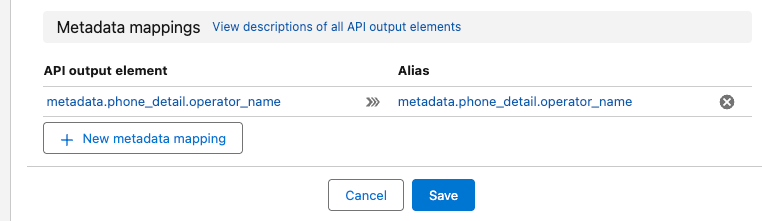
For phone numbers, a Metadata mappings section is visible at the bottom of the page.
You can create as many mappings as you require. For each mapping you first select from the list of possible elements from our API and an alias is automatically generated for you, although you are free to edit this string as required. For a full list of attributes and their descriptions refer to our Phone Validation API documentation.
Unwanted mappings can be removed using the cross icon to the right of the mapping and further new ones added using the New metadata mapping button.
Once all the mappings have been configured, click the Save button to save your Touchpoint configuration.